Trident Keys: Locations and Missing-Key Checklist
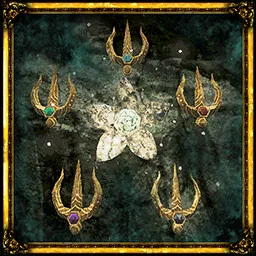
Track down Sapphire, Emerald, Ruby, Amethyst, and Onyx, and check which gates need one, three, or all five Trident Keys.
Obmuer Temple contains Sapphire and Emerald. Ruby comes from leveling the Trident weapon to 5, Amethyst costs 15 Ancient Coins at Umbada’s expanded shop, and Onyx drops from Lost King Ojjama. Before looking for a missing key, check the locks where you last used it. You can pull Trident Keys back out and reuse them.
Updated
Sources checked
On this page
Find the key you are missing
Scroll sideways for more columns. Use the arrow keys when the table is focused.
| Key | Pickup or unlock |
|---|---|
| Sapphire | From Obmuer Temple’s first Crystal Monument, follow the path to the explorer’s note above the flooded cavern. Drop into the cavern and check the stone wall near your landing. Use Sapphire at the single-slot door on the left across the water. |
| Emerald | Go through the Sapphire door to the large pit. Look down and Wind Dash into the open passage on the left. Follow the path up past the skeletal crossbowmen and inspect the rocks by the top of the stairs near the third Wind Gem. Use Emerald at the grate toward the Sacred Cistern Crystal Monument. |
| Ruby | Pick up the Trident from the base of the statue outside Obmuer Temple’s four-slate door. Equip it as your main weapon and hit enemies until it reaches weapon level 5. The head breaks off and becomes the key, so you lose the original weapon. |
| Amethyst | Defeat the Necronomicon in the Tower of Knowledge. Give the Golden Duck Figurine to Umbada at her Trading Outpost, then buy the key for 15 Ancient Coins. |
| Onyx | Start a trip between Wing Altars and step off the platform while the stars are visible. In the Petrified Garden, cross to Lost King Ojjama’s round platform with four Wind Dashes, or a Cestus uppercut followed by three dashes. Defeat Ojjama and collect the key. |
Use and retrieve keys in Obmuer Temple
Sapphire and Emerald are enough to progress through the temple. The three-slot door on the right in Sapphire’s cavern is an optional detour. Return to the locks where you used Sapphire and Emerald, take both keys back, and use them with Ruby or Amethyst at the three-slot door. The chest inside holds the Engraved Halberd.
If you are trying to reach the sealed middle room near the temple rest point, take the exit lift after Dagoom and look for an opening in the wall during the ride. Dash in through the opening for the side room.
Where to bring all five keys
On the Isle of Neasied, take the shortcut by the well and interact with the concealed wall behind the bushes. Bring five keys: three for the first door and two for the next. The White Tree Guardian beyond the second gate drops the Mystical Nut of the White Tree.
At the Petrified Garden’s central fountain, put Amethyst into the Ratty Bug slot, Sapphire into the Pus Bag, Emerald into the Giant Bat, Onyx into the deer-like Ungulacrita, and Ruby into the Homopiscium. The statues wake when all five are in place. After the encounter, retrieve the spent keys. They still work in ordinary Trident locks.