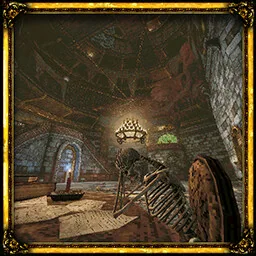
Tower of Knowledge: Entry, Upper Floors and Basement
Unseal the Tower of Knowledge, find the numbered gargoyles and Budaen's key, then clear the basement flesh and open the road to Deimpo.
Light the three outdoor gargoyle beacons with the Azure Torch to unseal the Tower of Knowledge. Inside, light Gargoyles III and VII, then use the lever below the Storm Gem to reach Budaen and get the Forbidden Archives Key. Defeat the Necronomicon to get the Acid Vial. Your Throwing Daggers can then clear the flesh blocking the road to Deimpo.
Updated
Sources checked
On this page
Unseal the tower entrance
The tower stands across the broken causeway on the eastern side of the Isle of Neasied. The gargoyle holding the Azure Torch stands outside the sealed entrance. Its plaque describes three beacons, and the bell sounds once for each one you light. The three stops below can be done in different orders.
- From Cemetery Precipice, take the raised path near the second Wind Gem, pass the blue lantern and double Wind Dash to the broken staircase. Light the gargoyle's mouth at the top.
- Check the island Wing Altar. Pull the lever at the nearby gate and take the right-hand fork beyond it to the gargoyle.
- After Dagoom in Obmuer Temple, take the upper exit lift. Dash from the fallen pillar to the surface platform and climb the stairs outside Erma's cave to light the temple beacon.
From the Foyer to the numbered balcony
- Defeat the Skeletal Executioner just inside to lower the gate in front of the Foyer Crystal Monument.
- Climb to the balcony and go through the central double doors into the Book Bug rooms. Past the side rooms, jump over the trapdoor to stay on the upper route. The drop leads to the basement loop, whose lift and lever-operated grate bring you back above the Foyer.
- Continue along the balcony and open the shortcut with the lever on the gold lift. Climb past the Manticore to the side door onto the numbered gargoyle balcony. Light III and VII with the Azure Torch, then return inside to the door with two gems over it.
- Go through the opened door and past the Poltergeists. Use the southwest door and pull the balcony lever to lower the ramp. Take the west door, then turn right through the next door to reach the Stairwell Crystal Monument.
Rotate the staircase and get Budaen's key
- Climb from the Stairwell monument and take the lift above it to the cabinet with red candles. The left branch leads to the outdoor Wing Altar and Wourha's study. The right branch leads up past a Manticore to the Storm Gem.
- From the Storm Gem stairs, look down to the left for a ledge. Wind Dash to it, then pull the lever by the railing near Wourha's door to rotate the staircase.
- Climb the rotated stairs and use the lift behind the right-hand door. At the bottom, pull the lever to link back to the Stairwell monument through the golden gate. Go through the east door from the lift room and speak to Budaen for the Forbidden Archives Key.
- Ride the lift back up and open the archive door with the key. Save at the Forbidden Archives monument, take the central lift up and follow the flesh tunnel to the uphill branch and the Necronomicon.
Recognize the library puzzle
Look for the six numbered shelves and the Missing Books notice in the library. Returning those specific volumes opens Rare Artifact Storage. Wourha's study near the Wing Altar is where you turn in Bestiary knowledge toward her book reward. The plain book slots next to grates take interchangeable books, so retrieve any library volume you leave in one.
For the grate beneath the upper stairs, return after clearing the flesh in the Necronomicon wing. Fill the plain book slot by the Pus Bag statue with the blue gem, then drop and dash under the stairs to fill the second slot by the grate. Use any two books and take them back after opening the cage. The cage a floor lower uses the single slot beside it.
Clear the flesh barrier in the basement
Collect the Acid Vial after the Necronomicon. It upgrades your Throwing Daggers automatically. Aim a dagger at each face set into a growth. A growth with several faces stays up until the last one is gone.
- Drop through the Book Bug stairway trapdoor again. Take the northwest tunnel to the candles and turn southeast for one face. A second face is north of the trapdoor landing, near candles and Crawlers.
- Use the basement lift to loop back to the Foyer. Return to the staircase above the trapdoor, climb onto the table and use three Wind Dashes toward the northwest ledge. Interact with the wall there to open the hidden door. Defeat Archivist Inha and drop through the hole beyond her room to reach the remaining basement face.
- Hit the last face and open the south gate for a shortcut back into the basement loop. The Candle Crawler room beyond the barrier has a further locked door. The deep cavern past the underground lift is a return trip if your three dashes cannot carry you farther.
Open the road to Deimpo Mausoleum
Return to the Stairwell monument. Use the door one landing up and turn right through the golden gate, then left into Budaen's room. Hit the face blocking the far end with an acid-enhanced Throwing Dagger and take the stairs beyond it to the broken bridge. The road across the bridge leads to Deimpo Mausoleum. You can take it as soon as this face is gone.