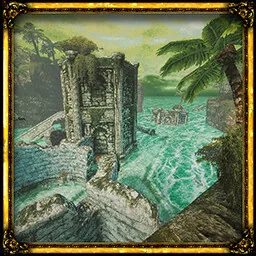
Obmuer Temple: Approach, Routes and Exit
Cross from the Isle of Neasied to Obmuer Temple, reach the Sacred Cistern and Prison Corridor, and take Dagoom's lift to the Tower route.
With two Wind Dashes, cross the broken bridge southwest of the tower above Knight's Encampment to reach Aganmi's Camp. Four Triangular Slates open Obmuer Temple. Inside, use the Sapphire and Emerald Trident Keys and collect the third Wind Gem. Defeat the three Royal Orbewa Guards and Dagoom, then ride the lift to the temple beacon and Wing Altar.
Updated
Sources checked
On this page
Cross to the flooded ruins and open the temple
- From Knight's Encampment, climb the stairs and pass the tower on its left. Find the broken bridge southwest of the tower and use two Wind Dashes to reach Aganmi's Camp.
- Save there and head into the shallow flooded ruins. Look for a slate past the round structure and Red Nibblers, another across the broken wall above the stone ramp, one near the fallen pillar southwest of the camp route, and one on the isolated platform northeast of the ramp.
- At the top of the ramp, the Trident weapon rests by a statue. The way into the temple is down the ramp beside it. Fit a slate into each of the door's four sockets, then save at the Cave Entrance monument.
Reach the Sacred Cistern with three dashes
- Follow the entrance ramp down to the circular metal gate. Drop from the flowing-water ledge beside the explorer's note. The Sapphire Trident Key is set into the wall by the landing. Use it on the single-slot gate to get to the first overlook.
- Look down from the overlook and double Wind Dash into the open circular doorway on the left. Continue to the stone stairs where skeletons ambush you. Pick up the Emerald Trident Key from the rock above.
- Past the stairs, dash the next gap and take the third Wind Gem. Farther on, pull the lever to raise the stairs back to the upper route. Use the Emerald key on the gate ahead and save at the cistern.
- The side cave by the gate has another lever that links the cistern and entrance routes. Use it to retrieve the Sapphire key, and take the Emerald key back from its slot. At the cistern monument, use three consecutive Wind Dashes across the wide gap.
- Continue down the dark central corridor past the pointing skeleton. Take the passage lit by daylight to the Prison Corridor monument.
Open Dagoom's round door
- At Prison Corridor, take the passage south between two lit torches to the flooded cavern.
- Find Yepo in the lower southwest waterway. Follow the low passage around the waterfalls to Erda. Beyond the Splash Hammer alcove, follow the uphill path by the torch and take the left fork to Wami.
- After all three Royal Orbewa Guards fall, take the right fork at the top of that hill. The round door opens. Drop inside and defeat Dagoom the Sea King, then save by the lift past his arena.
Ride the lift out and light the beacon
- Ride the lift up, follow the walkway out of the cave and get onto the broken pillar to dash up to the surface platform.
- Find Erma's cave on the left. Outside, take the stairs up to the gargoyle and use the Azure Torch on it for a beacon bell. Go back down to the spire and activate the Wing Altar.
- Warp to the Isle of Neasied. If the beacon by the island altar is still unlit, pull the nearby gate lever and check the right-hand fork. Once all three beacons have rung, cross back to the Tower of Knowledge door.
Shortcuts and gates to revisit
From the prison side passages, interact with the solid wall at the end of the southwest tunnel. The passage joins the opening in the west wall of the lift shaft above Dagoom. It saves a trip through the guard cavern when you return.
The three-slot gate near the first Sapphire pickup leads to the Engraved Halberd. Leave this for when you have a third key. The small Trident gate rooms by Prison Corridor also branch from the route to Dagoom.
The clifftop beyond the gargoyle railing above the surface exit is the tiara route. Use the Cestus uppercut to gain height and Wind Dash across when you have the range.