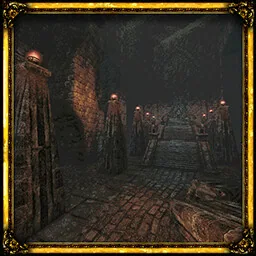
Deimpo Mausoleum: Route, Upper Rooms and Exits
Cross into Deimpo Mausoleum, ride the moving pillars, find the mask and six Puwema sigils, then reach the shaft to the Ancient World.
Use acid-enhanced Throwing Daggers on the flesh in Budaen's room, then cross the broken bridge to Deimpo Mausoleum. Inside, use the moving pillars to collect Wind Gem four. Find Puwema's Lens and the Mask of Second Sight, then dispel six green sigils to open the fight with Poenir and Duenir. The shaft beyond that arena leads to the Ancient World.
Updated
Sources checked
On this page
Cross the bridge and reopen the camp door
- Exit the Tower from Budaen's room after clearing its flesh face. Use three Wind Dashes across the gap in the upper bridge. Follow the route past the skeletal marksmen and into the Mausoleum.
- Drop into the entrance hall. Activate the lift along the north wall for a return to the upper entrance. Pull the lever on the far west door to open a shortcut to Knight's Encampment on the Isle.
- Pull the lever beneath the east stairs to open the upper door. Take that door and follow the descending stair to the Crumbling Stairwell Crystal Monument.
Start the pillars and take the fourth Wind Gem
- Take the east passage from Crumbling Stairwell and open the door with its lever. Go down the staircase and drop to the platform on the north side. Cross to the east ledge and activate the return lift there.
- Take the west tunnel past the bat statue and Wheel Dancer and pull the lever at its end. Then take the east tunnel past the lift, go southwest at the fork beyond the Golem and use the lever in the northwestern spider passage. These levers set the columns moving.
- Return up the lift and take the stairs to the platform facing south. Ride the moving pillars across. On the far side, take the northeast stairs and pull the lever for a rising-pillar shortcut. Open the door at the end of the blue-torch passage to reconnect with Crumbling Stairwell.
- Ride the rising pillars to the Wind Gem at the top. With four dashes, return to Crumbling Stairwell and head east through the open door on the right. Turn left at the crossing and dash to the far door. Open it and take the spiral stair down to the Lower Area monument.
Find Peha and equip the Mask of Second Sight
- Go south from the Lower Area and drop to the statue below. Facing east at the statue, take the left path uphill to the candles, then go east through the sarcophagi to the lit chamber. Speak to Peha at Puwema's Rest Room to get Puwema's Lens.
- Go upstairs, then take the lower route beneath the moving bridge. Take the northeastern path uphill past the three jug statues, then turn west onto the curved bridge. Follow it south to the giant statue holding a scroll and cross.
- Drop into the room below and pull both side-room levers to open the metal gate. Beyond it, look for the mask by the blue-lit tombs near Chef Gagi's kitchen. Equip it as an accessory with Puwema's Lens.
Clear the six green sigils
With the mask equipped, follow the green leaves and interact with the glowing marks. They work in any order. Near Chef Gagi's kitchen, the six green flames show your progress. When all six are lit, approach the Queen Siraatsu statue and it moves to reveal the boss passage.
Scroll sideways for more columns. Use the arrow keys when the table is focused.
| Landmark | Route |
|---|---|
| Blue lantern statue above Puwema's Rest Room | Go left from the statue. The mark is beyond the Grave Eyes, in the room with Ujji's Reanimated Corpse. |
| Upper ledge outside Puwema's Rest Room | Drop below the moving bridge and take the northeast door up to the three jug statues. Go east to the ledge overlooking the path outside Peha's room. |
| Side tunnel by the curved bridge | From the jug statues go west across the curved bridge. Use the lever at the far end and dash to the side tunnel by the elevating pillar. |
| Lower level below the purple skeleton | Drop under the curved bridge and face east from the blue lantern. Follow the leaves into the area under the Melting Moon pickup. |
| Blue lantern statue in the lower cave | Go south from the mark below Melting Moon and follow the leaves into the candlelit cave, near the statue below. |
| Sarcophagus between the two blue torches | Follow the curved bridge around to the large statue, then use the two side-room levers below it. The metal gate leads back into this sarcophagus room. |
Leave through the shaft or return by the Wing Altar
Defeat Poenir and Duenir. The webbing burns away to reveal the broken wall southeast of the arena. Speak to King Gius Abraon, collect Unok's Remains and take the passage behind him down the ventilation shaft.
For a return trip, climb the spiral stair northwest of the blue-torch sarcophagus near Gagi's kitchen. It passes the Knights Expedition Chest Key and reaches the Mausoleum Wing Altar, which reconnects with Crumbling Stairwell.
For Wodaso's Lens, come back with four Wind Dashes and take the high opening above the entrance hall out to the roof. Defeat the Noble Sentinel for the Teal Green Seal Breaker, then cross the three islands south of the roof to the green-sealed ruin.
Return later for the Memento Mirror route
Show spoiler details
After the Herald of Okbujo gives you the Memento Mirror in the Record of Sin, return to the Mausoleum. Use it at Peha's coffin or beside the king beyond the boss room to speak to their spirits.
The forge for the mementos is another return. At the bottom of the large red-water room, look to the right of the bat statue with the green gem for the hidden wall with four symbols. Bring the Mask of Second Sight with all four lenses to open it.