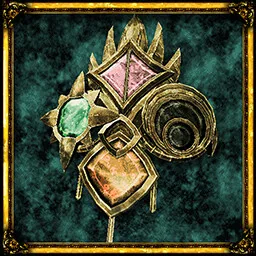
Lenses: Which Lenses to Find and Where to Use Them
Find Puwema’s, Wodaso’s, Jigeki’s, and Sipeha’s Lenses, and match each to the hidden signs it reveals.
The Mask of Second Sight takes four lenses. Use Puwema’s to dispel the green mausoleum runes, Wodaso’s to trace hidden mechanisms, Jigeki’s to expose the wards on the Rotting Cavern fountains, and Sipeha’s to reveal the seals on the eight seated statues. Equip the mask as an accessory to see the markings.
Updated
Sources checked
On this page
Choose the lens for the obstacle in front of you
Scroll sideways for more columns. Use the arrow keys when the table is focused.
| Lens | Where it comes from | What it reveals |
|---|---|---|
| Puwema’s Lens | Speak to Peha in Puwema’s Rest Room deep in Deimpo Mausoleum. | Green leaf trails and six green runes on the mausoleum route. Interact with the runes while wearing the mask to clear the seal on the way to Poenir and Duenir. |
| Wodaso’s Lens | Defeat the Noble Sentinel on Deimpo Mausoleum’s roof, then take its Teal Green Seal Breaker to the round ruin on the last island to the south. | Hidden mechanisms. At the three-torch gate in the mausoleum, trace the streams back to their switches. When a switch is hit, its stream disappears. |
| Jigeki’s Lens | Match the four Stone Tiaras above Obmuer Temple, bring the three Jigeki Key pieces through the floor, and defeat Muagyo’s Congregation. | Wards on the rot fountains. Break them to clear the corrupted water and reach the Sipeha statue beneath the falls. |
| Sipeha’s Lens | Open the chest beside the broken sculpture inside the Temple of Puwema, at the top of Verdant Hollow. | Circular magic seals on seated statues. Interact with all eight seals to open the temple’s eight-torch door. |
Find the mask and the two mausoleum lenses
The Mask of Second Sight is inside Deimpo Mausoleum just beyond the eastern door out of Chef Gagi’s room. Pick it up and equip it in an accessory slot. Lenses you obtain belong to the mask. If you have Wodaso’s Lens before finding the mask, it attaches when you pick up the mask.
For Puwema’s Lens, start at the Crumbling Stairwell Crystal Monument and go east. Cross the gap to the door with four Wind Dashes. Pull the lever and descend the spiral staircase marked by blue torches. Continue through the statue chambers and past the sarcophagi to the lit room with its own Crystal Monument. Speak to Peha there.
For Wodaso’s Lens, take the Noble Sentinel roof route for the Teal Green Seal Breaker. From the roof ruins, go to the spiral cliff and follow the island chain south to southeast. Open the green-jewel door on the last island and take the lens from the chest.
Collect the three Jigeki Key pieces
- Deimpo Mausoleum. Go to the spider caves and find the moving stone pillar. Enter its side opening when the pillar is up, ride it down, and follow the chamber to the key piece.
- Rotting Cavern. Approach the Gigantic Serf’s waters in the rot lake. Defeat the giant fish and collect the piece it leaves.
- Ancient World. At the bridge to Siraatsu Castle, descend to the cable and follow it to the hidden cave under the bridge. The third piece is inside.
- Return to the Stone Tiara puzzle above Obmuer Temple. Drop through the opened floor, use all three pieces on Jigeki’s Temple door, and defeat Muagyo’s Congregation for the lens.
Get Sipeha’s Lens before the eight-seal hunt
From the Rotting Cavern’s Crumbling Fortress Crystal Monument, take the uphill route on the right into upper Verdant Hollow. Enter the Temple of Puwema and check the chest by the broken central statue. The eight-torch door is farther inside, so you can collect the lens before opening that door.
If a seated statue’s seal is missing, equip the mask and confirm you have Sipeha’s Lens. For the statue under the Rotting Cavern falls, use Jigeki’s Lens on the fountains first. Beneath the awakened Petrified Garden, the four crowned fish-men guard another set of seals. That route uses all four lenses, one for each seal.